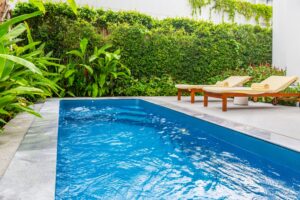
Thinking about adding a plunge pool to your yard? You’re making a great choice! Plunge pools are smaller than traditional swimming pools, making them easier to install and maintain while still providing a refreshing spot to cool off.
A successful plunge pool installation requires careful planning and preparation to ensure the process goes smoothly. From site excavation to equipment setup, each step plays a crucial role in creating your backyard oasis. With proper preparation, you can have your plunge pool ready to enjoy in days rather than the months typically needed for conventional pools.
We’ve created this essential checklist of 8 must-have preparation steps to guide you through the plunge pool installation process:
- How to install a plunge pool?
- Can you install a plunge pool yourself?
- Site planning and preparation checklist
- Installation options: Above ground, semi inground, or fully inground
- How much does it cost to install a plunge pool?
Following these steps will help you avoid common pitfalls and ensure your new pool integrates perfectly with your outdoor space, ready for years of enjoyment.
How to install a plunge pool?
Installing a plunge pool requires careful planning and preparation. We’ve outlined eight essential steps to ensure your installation goes smoothly from start to finish.
Proper site selection, accurate measurements, and obtaining necessary permits are crucial first steps. Don’t forget to consider access for equipment and prepare your site by clearing obstacles and ensuring proper drainage.
Working with professionals is highly recommended for tasks like excavation and pool placement. Most plunge pools are between 4-8 feet deep, but this can be customized to your preferences.
The installation process typically includes preparing the base, setting the pool, connecting utilities, and filling with water. A standard garden hose will take 6-12 hours to fill your pool, or you can use a water delivery service to reduce this time to about 15 minutes.
Remember to install a hydrostatic valve as indicated in installation guides to prevent damage from groundwater pressure. This is an essential step often overlooked by DIY installers.
By following these preparation steps carefully, you’ll avoid delays and complications during your plunge pool installation. The result will be a beautiful water feature that provides years of enjoyment without the footprint of a full-sized swimming pool.
Can you install a plunge pool yourself?
Installing a plunge pool can be a DIY project for those with the right skills and tools, but it’s not suitable for everyone. The complexity varies based on pool size, site conditions, and local regulations.
When diy installation is feasible (and when it’s not)
DIY installation works best with smaller, above-ground plunge pools or prefabricated fiberglass options. These typically require less excavation and technical expertise. Homeowners with construction experience and proper equipment can handle these installations.
However, we don’t recommend DIY for concrete plunge pools or in-ground installations that require extensive excavation. These projects need specialized knowledge of structural engineering, plumbing, and electrical systems.
Sites with difficult access, unstable soil, or high water tables also call for professional installation. If your property has slopes greater than 15 degrees or requires retaining walls, hire experts.
Remember that mistakes during installation can lead to expensive repairs later. For pools exceeding 5,000 gallons or those requiring complex filtration systems, professional installation is safer.
Tools, skills, and permits required
Required Permits:
- Building permit
- Electrical permit
- Plumbing permit
- Zoning approval
Essential Skills:
- Reading construction plans
- Basic excavation techniques
- Concrete work experience
- Plumbing knowledge
- Electrical safety understanding
Tool Checklist:
- Excavator or backhoe
- Laser level
- Compactor
- Concrete mixer
- Plumbing tools
- Electrical testing equipment
Before starting, we recommend consulting local building codes. Most jurisdictions require permits for any pool installation, even small plunge pools. You’ll need to submit detailed plans showing dimensions, setbacks from property lines, and safety features.
The electrical work is particularly critical. All wiring must meet local codes, with proper grounding and GFCI protection. Improper electrical work is both dangerous and illegal.
What goes wrong most often in diy setups
Improper leveling ranks as the most common DIY mistake. Even small errors in foundation preparation can cause cracking, leaking, or structural failure over time. Always use laser levels and take multiple measurements.
Water management problems frequently occur when DIYers don’t properly install drainage systems. This leads to erosion around the pool and potential foundation damage. Ensure proper backfilling and compaction around the structure.
Equipment sizing errors are also common. Many DIYers install pumps and filters that are too small for their pools, resulting in poor water quality and premature equipment failure.
Plumbing leaks happen when connections aren’t properly sealed or when pipes are damaged during backfilling. We recommend pressure testing all plumbing before covering it.
Electrical issues present serious hazards. Improper wiring can lead to electrocution risks or equipment damage. Always follow code requirements for outdoor wiring and consider hiring a licensed electrician for this portion of the project.
Site planning and preparation checklist
Proper site planning is crucial before installing your plunge pool. Taking time to assess your property and prepare adequately will save you headaches later and ensure your pool installation goes smoothly.
How to assess your space and soil
Start by measuring your available space carefully. A plunge pool typically requires at least 10-15 feet in each direction, including space for equipment and access.
Test your soil type by digging a small hole and examining the composition. Sandy soil drains well but may need reinforcement, while clay soil might require additional drainage solutions.
Conduct a percolation test to determine how water drains through your soil:
- Dig a 1-foot hole
- Fill with water and let it drain
- Fill again and time how long it takes to empty
Check for underground obstacles like tree roots or rocks that could interfere with excavation. Remove these obstacles before installation begins.
Clearance, slope, and drainage requirements
Your plunge pool needs proper clearance from structures. Most building codes require pools to be at least 5-10 feet from property lines and 10 feet from your home’s foundation.
Slope considerations:
- Ideal ground slope: less than 2%
- Moderate slope (2-5%): may require retaining walls
- Steep slope (>5%): needs significant grading work
Proper drainage is essential. Water should flow away from both your pool and home. Install a French drain system if your yard tends to collect water.
Consider access for construction equipment. You’ll need at least an 8-foot-wide path for machinery to reach your installation site.
Utility lines, zoning rules, and HOA approval
Contact utility companies to mark underground lines before digging. This is typically a free service but requires advance notice of 2-3 business days.
Review local zoning laws that may affect your pool installation:
- Setback requirements
- Maximum lot coverage rules
- Fencing requirements (usually 4-6 feet high)
- Permit requirements
Check your HOA regulations if applicable. Many HOAs have specific rules about:
- Pool size and style limitations
- Construction hours
- Landscaping requirements
- Approval processes
Gather all necessary permits before beginning work. This typically includes building, electrical, and sometimes plumbing permits.
Choosing the right spot for sun, privacy, and access
Select a location that receives 6+ hours of sunlight daily for natural heating and comfortable swimming conditions. Morning sun is preferable to afternoon exposure for temperature control.
Consider privacy from neighbors and the street. Strategic placement can maximize your comfort while using the pool.
Place your pool where it’s visible from your home for safety, especially if you have children. This allows for easy supervision.
Think about access to utilities:
- Electrical connections for pumps and heaters
- Water supply for filling
- Drainage options
Balance convenience with aesthetics. The pool should be easily accessible from your home while enhancing your outdoor living space.
Installation options: Above ground, semi inground, or fully inground
When installing a plunge pool, you have three main placement options that dramatically affect both the project’s complexity and your overall experience. Each installation method offers unique benefits for different property types, budgets, and aesthetic preferences.
Pros and cons of each installation style
Above Ground Pools
- Pros: Easiest and quickest installation. No excavation required. Lower initial cost. Portable if you move. Less permanent commitment.
- Cons: More visible in your landscape. Requires steps or a deck for access. May look less integrated with your yard design.
Semi-Inground Pools
- Pros: Versatile for sloped yards. Creates a unique look. Can be surrounded by partial decking. Offers more design flexibility than above-ground options.
- Cons: Requires partial excavation. More expensive than fully above-ground options. Wall stability concerns if not properly installed.
Fully Inground Pools
- Pros: Most aesthetically pleasing. Seamless integration with landscape. Better longevity and durability. Higher property value impact.
- Cons: Most expensive option. Requires complete excavation. Longest installation time. May need permits and inspections.
Which options are better for small backyards
For tight spaces, semi-inground and above-ground pools often work best. Above-ground plunge pools can be positioned strategically without extensive excavation, making them ideal for small yards with limited access.
Semi-inground options excel in small yards with slopes or elevation changes. By partially burying the pool, you can work with natural terrain features rather than fighting against them.
Fully inground plunge pools work in small spaces too, but require more planning. The advantage is they don’t visually intrude on limited space like an above-ground model might.
We recommend measuring your available space carefully. Consider access paths, equipment placement, and surrounding deck or patio areas when determining which installation style fits your small yard.
How installation method affects cost and maintenance
Cost Differences:
- Above-ground: $5,000-$15,000
- Semi-inground: $10,000-$25,000
- Fully inground: $20,000-$50,000+
The installation method significantly impacts ongoing maintenance too. Above-ground pools are easier to access for cleaning but may require more frequent wall maintenance and have shorter lifespans.
Semi-inground pools combine maintenance challenges of both styles. The buried portion resists damage better, but the exposed walls need regular checks for structural integrity.
Fully inground pools typically have longer lifespans and better stability. However, accessing plumbing and equipment for repairs might require professional help.
Winterization costs also vary by installation type. Above-ground pools may need more protection from freezing temperatures than inground options with proper depth.
Timeline expectations: Prefab vs Custom
Prefabricated Above-Ground Pools
- Site preparation: 1-2 days
- Installation: 1-3 days
- Total timeline: 2-5 days
Prefabricated Semi-Inground Pools
- Site preparation and excavation: 2-4 days
- Installation: 2-3 days
- Total timeline: 4-7 days
Custom Inground Pools
- Design and permitting: 2-6 weeks
- Excavation: 1-2 days
- Installation/construction: 1-4 weeks
- Finishing work: 1-2 weeks
- Total timeline: 4-12 weeks
Prefabricated plunge pools significantly reduce installation time regardless of placement style. These factory-built units arrive ready to install, needing only site preparation and utility connections.
Custom options take longer but offer more design flexibility. The timeline extends further if you’re adding special features like custom lighting, water features, or integrated heating systems.
How much does it cost to install a plunge pool?
Installing a plunge pool represents a significant investment that varies based on several key factors including size, materials, location, and additional features. Understanding these cost elements will help you plan your budget effectively and avoid unexpected expenses.
Average installation costs by type and depth
Plunge pools typically cost between $15,000 and $40,000 with installation, making them considerably more affordable than traditional swimming pools. The price varies significantly based on the type:
- Fiberglass plunge pools: $20,000-$35,000
- Concrete plunge pools: $25,000-$45,000
- Vinyl liner plunge pools: $15,000-$30,000
Depth also impacts pricing substantially. Standard plunge pools are 4-7 feet deep, with each additional foot of depth adding approximately $3,000-$5,000 to your total cost.
For infinity-edge designs, expect to pay a premium of 30-40% above standard pricing, with costs ranging from $25,000 to $50,000.
DIY vs professional installation cost comparison
Professional installation typically accounts for 25-35% of your total plunge pool budget. Here’s how the costs break down:
| Installation Type | Average Cost | Pros | Cons |
| Professional | $5,000-$15,000 | Warranty coverage, proper permits, expert excavation | Higher upfront cost |
| DIY Kit | $10,000-$25,000 (materials only) | Potential savings of $5,000-$10,000 | Requires significant skill, no warranty, permit challenges |
We strongly recommend professional installation for most homeowners. DIY installation risks costly mistakes with excavation, electrical work, and plumbing that could exceed any initial savings.
Add-ons that increase the final budget (heating, decking, covers)
Various add-ons can significantly increase your plunge pool budget:
Heating systems: $1,500-$5,000 depending on type
- Electric heaters: $2,000-$3,000
- Gas heaters: $2,500-$5,000
- Solar heating: $3,000-$5,000
Decking materials (per square foot):
- Concrete: $6-$15
- Wood: $15-$30
- Stone: $20-$35
- Composite: $15-$25
Pool covers provide safety and heat retention:
- Manual covers: $500-$1,200
- Automatic covers: $1,500-$3,000
Other common add-ons include lighting ($500-$1,500), water features ($1,000-$5,000), and automation systems ($1,500-$3,000).
On the other hand, some may represent a long-term saving. According to the U.S. Energy Department, using a pool cover not only retains heat but also saves water—reducing evaporation by up to 40% and chemical use by as much as 60%.
Also, maintaining water at around 78°F maximizes user comfort while keeping heating costs under control, aligning with the U.S. Department of Energy guidance
How to estimate total cost before buying
Creating an accurate budget requires thorough research and planning. Follow these steps to develop a reliable estimate:
- Measure your available space precisely to determine maximum pool dimensions.
- Contact at least three pool contractors for detailed quotes specific to your property.
- Factor in site preparation costs including excavation, grading, and potential utility relocations ($1,000-$5,000).
- Include permit fees which typically range from $200-$1,000 depending on your location.
- Calculate ongoing costs including electricity ($50-$150/month), water ($10-$30/month), and chemicals ($20-$50/month).
We recommend adding a 10-15% contingency buffer to your budget for unexpected expenses. Most homeowners find that final costs exceed initial estimates by about 10%.
Conclusion
Installing a plunge pool can add both enjoyment and value to your home. By following our 8-step preparation checklist, you’ll ensure a smoother installation process with fewer surprises along the way.
Proper planning is essential for success. From checking local regulations to preparing your site and setting a realistic budget, each step helps create the foundation for your perfect backyard oasis.
Remember that professional help is valuable. Working with experienced contractors or pool installers can save you time and prevent costly mistakes.
With your plunge pool installed, you’ll have a wonderful spot to cool off, relax, and entertain. Homes with pools typically sell for about 8% more than those without, making this not just a lifestyle improvement but potentially a smart investment too.
The preparation may seem detailed, but it’s worth the effort. A well-planned plunge pool installation will provide years of enjoyment with minimal stress during the process.
Get in touch with Little Dipper Pools to start your plunge pool installation—our team will guide you through every step, from permits to final placement.


