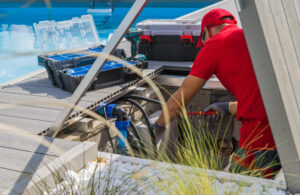
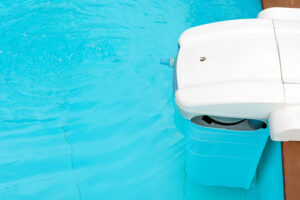
Getting a vinyl liner pool installation for your home is an exciting decision that involves several important steps and considerations. The installation process typically takes 1-2 weeks and involves excavation, structural setup, plumbing, and finally installing the vinyl liner itself. Understanding what happens during each phase will help you prepare and know what to expect from your pool contractor.
We’ll walk you through everything from the basics of vinyl liner pools and why they’re popular with homeowners to the detailed installation process. You’ll learn about the foundation work that goes beneath your liner, how much the project typically costs, and when you might need liner replacement versus a complete reinstallation.
Below, we’ll walk through each important aspect to help you plan confidently and avoid common issues:
- What is a vinyl liner pool and why homeowners choose it
- What goes under a vinyl pool liner and why it matters
- What to expect during swimming pool liner installation
- Replacing a pool liner vs. full reinstallation
- Vinyl liner pool installation costs and considerations
Whether you’re just starting to research pool options or you’ve already decided on a vinyl liner pool, keep reading! This guide will give you the knowledge you need to make informed decisions throughout your pool installation journey.
What is a vinyl liner pool and why homeowners choose it
A vinyl liner pool uses a custom-fitted plastic liner inside a frame of wall panels to create the pool structure. Homeowners choose vinyl liners for their lower upfront costs, unlimited design options, and smooth surface that feels comfortable underfoot.
Benefits of vinyl for flexibility, budget, and design
Vinyl liner pools offer the most design flexibility of any pool type. We can create virtually any shape or size to fit your backyard space. Custom curves, unique angles, and specialized depths all work well with vinyl construction.
The budget advantage makes vinyl pools attractive to many homeowners. Installation costs run significantly lower than concrete pools. You get a quality swimming pool without the premium price tag.
Vinyl liners feel smooth and comfortable against your skin. The soft surface prevents scrapes and cuts that can happen with rougher pool materials. This comfort factor appeals to families with young children.
Maintenance stays simple with vinyl pools. The non-porous surface resists algae growth better than concrete. Chemical usage often stays lower, which saves money over time.
We can install vinyl pools faster than concrete options. Most installations complete within 2-4 weeks. This quick turnaround gets you swimming sooner.
How vinyl liners compare to concrete or fiberglass
Upfront costs favor vinyl pools significantly. Concrete pools typically cost 50-70% more than vinyl installations. Fiberglass pools fall between vinyl and concrete in price.
Installation time differs greatly between these options. Vinyl pools install in 2-4 weeks. Concrete pools often take 8-12 weeks or longer. Fiberglass pools install quickly but offer limited shape options.
Surface texture varies between materials. Vinyl feels smooth and soft. Concrete can feel rough and may cause scrapes. Fiberglass offers a smooth surface but can develop gel coat issues.
Customization options give vinyl pools a clear advantage. We can create any shape or size with vinyl. Concrete also allows custom shapes but costs much more. Fiberglass pools come in pre-made shapes only.
Long-term maintenance requirements differ for each type. Vinyl liners need replacement every 8-12 years. Concrete pools require resurfacing every 10-15 years. Fiberglass pools need gel coat repairs over time.
When a vinyl liner fits perfectly with precast pools
Precast pools use factory-made wall panels that arrive ready for installation. Vinyl liners work perfectly with these precast systems. The combination creates a durable, attractive pool at a reasonable cost.
Quality control improves with precast vinyl pool systems. Factory production ensures consistent panel quality. We avoid the weather delays and quality issues that affect on-site concrete pours.
Installation speed increases when we combine precast panels with vinyl liners. The panels install quickly and precisely. The vinyl liner provides a perfect waterproof barrier.
Cost savings multiply when homeowners choose precast vinyl pools. Factory production reduces labor costs. The vinyl liner eliminates expensive concrete finishing work.
Structural strength remains excellent with precast vinyl systems. Steel or polymer panels provide strong walls. The vinyl liner adds flexibility that helps prevent cracking from ground movement.
What goes under a vinyl pool liner and why it matters
The foundation beneath your vinyl liner plays a crucial role in your pool’s longevity and performance. We’ll explore the essential base materials, proper preparation techniques, and protective measures that ensure your liner stays smooth and damage-free for years to come.
Do I have to put sand under my pool liner?
Sand is not always required under your vinyl pool liner, but it’s one of the most common base materials we use. The choice depends on your specific pool construction and local building practices.
Common base material options include:
- Sand base – Most affordable option, provides smooth foundation
- Vermiculite – Higher quality cement mixture, hand-troweled for precision
- Specialized pool pads – Armor Shield or Gorilla Pad materials
Sand works well for most installations because it’s easy to level and creates a uniform surface. However, vermiculite offers superior smoothness and durability.
The terrain around your pool affects our material choice. Hilly or complex landscapes may require different substrates than flat areas.
We always ensure whatever base material we choose provides proper support and protection for your liner investment.
Substrate prep for durability and smooth finishes
Proper substrate preparation is critical for preventing future problems with your vinyl liner. We start by creating a perfectly level foundation that eliminates any sharp objects or debris.
Our preparation process includes:
- Removing rocks, roots, and sharp materials
- Leveling the surface to precise measurements
- Compacting the base material thoroughly
- Creating smooth transitions at pool walls
Vermiculite requires hand-troweling along the bottom and up the sidewalls. This creates an extremely smooth surface that prevents liner imperfections.
Sand bases need careful leveling and compaction. We use specialized tools to ensure consistent depth and eliminate soft spots that could cause settling.
The quality of substrate preparation directly impacts your liner’s appearance and lifespan. Poor preparation leads to wrinkles, thin spots, and premature wear.
Protecting the liner from damage and wrinkles
We use protective materials between the substrate and liner to prevent punctures and extend liner life. These barriers stop insects, roots, and sharp objects from reaching your vinyl.
Key protective features:
- Breathable materials allow moisture to escape naturally
- Puncture resistance stops moles and insects from penetrating
- Smooth surface prevents wrinkles and stress points
Specialized pool pads like Armor Shield provide superior protection compared to basic sand alone. These materials are designed specifically for pool applications.
Proper protection also helps manage hydrostatic pressure beneath your pool. This pressure can cause bulges and damage if not properly addressed during installation.
We ensure all protective layers are installed correctly to prevent shifting or bunching that could damage your liner over time.
What to expect during swimming pool liner installation
The installation process involves careful measuring, proper fitting, and thorough sealing to ensure your liner stays in place for years. Precast pools have different requirements than traditional installations, and knowing the timeline helps you prepare your home and schedule.
Measuring, fitting, and sealing the liner
We start by taking precise measurements of your pool using a template from the liner manufacturer. This template accounts for your pool’s shape, length, width, and corner radius.
The measurement process also includes recording wall height, depth, and slope profiles. These details ensure your new liner fits perfectly without wrinkles or loose areas.
During fitting, we carefully position the liner and smooth out any air pockets. The liner must align properly with all custom features like steps, lights, and skimmers.
Key fitting steps include:
- Positioning the liner in the pool
- Securing it to the coping track
- Smoothing out wrinkles and air bubbles
- Checking alignment with pool features
We seal the liner by filling the pool with water while adjusting the fit. The water pressure helps the liner conform to the pool’s shape. We make final adjustments to prevent slipping or bunching.
How the process differs for precast pool liner installs
Precast pools have smooth, uniform surfaces that make liner installation easier. We don’t need to worry about rough concrete or uneven walls that can damage the liner.
The measuring process is more straightforward with precast pools. The walls are already smooth and the dimensions are more consistent than poured concrete pools.
Precast pool advantages:
- Smoother surface reduces liner damage risk
- More consistent measurements
- Faster installation time
- Better liner adhesion
We still follow the same basic steps but spend less time on surface preparation. The liner fits more easily against the precast walls without additional padding or smoothing.
Timeline and what homeowners should prepare for
Most liner installations take one to two days to complete. We need access to your pool area and electrical power for our equipment.
Day 1: We remove the old liner and prepare the surface. This includes cleaning the walls and checking for any damage that needs repair.
Day 2: We install the new liner, fill the pool, and make final adjustments. You should avoid using the pool for 24-48 hours after installation.
What homeowners should prepare:
- Clear access to the pool area
- Remove pool furniture and decorations
- Ensure water supply is available
- Keep pets and children away during installation
We recommend scheduling installation during mild weather. Extreme heat or cold can make the liner material harder to work with and may affect the final fit.
Replacing a pool liner vs. full reinstallation
Pool owners face a key choice when their vinyl liner shows wear: replace just the liner or do a complete pool reinstallation. The right decision depends on your pool’s structure, the extent of damage, and your long-term goals.
Signs it’s time for replacing pool liner
Visible damage is the most obvious sign your liner needs replacement. Look for tears, holes, or wrinkles that can’t be repaired with simple patches.
Fading and discoloration occur after years of sun exposure and chemical treatments. When your liner looks dull or has permanent stains, replacement gives your pool a fresh appearance.
Water loss that isn’t explained by normal evaporation points to liner leaks. Small holes can often be patched, but multiple leak points mean it’s time for a new liner.
Age matters too. Most vinyl liners last 10-15 years with proper care. If your liner is approaching this age range and showing multiple issues, replacement is more cost-effective than ongoing repairs.
Stretching and sagging around steps, corners, or the deep end indicate the liner material has lost its elasticity. This creates wrinkles that trap dirt and make cleaning difficult.
When resurfacing isn’t enough
Resurfacing works well for minor cosmetic issues, but some problems require full liner replacement. Structural damage to the pool walls or floor makes resurfacing impossible.
Multiple repair attempts that fail indicate the liner material itself is compromised. When patches don’t hold or new problems keep appearing, we recommend full replacement.
Cost comparison often favors replacement over repeated resurfacing. While resurfacing costs less upfront, multiple treatments add up quickly.
Chemical damage from improper water balance can weaken the entire liner. When chlorine or pH imbalances cause widespread deterioration, only replacement restores full protection. EPA labels warn “In no case should tablets be thrown directly into or on a vinyl liner as bleaching will result.
Warranty considerations also matter. New liners come with manufacturer warranties, while resurfaced areas typically have limited coverage.
How Little Dipper ensures a perfect liner match
We measure your pool precisely to ensure your new liner fits perfectly. Custom measurements account for every curve, step, and unique feature of your pool.
Pattern selection helps you choose from hundreds of designs and colors. We bring samples to your home so you can see how different options look in your actual lighting conditions.
Professional installation prevents common problems like wrinkles, air bubbles, and improper stretching. Our team has the tools and experience to install your liner correctly the first time.
Quality materials make a difference in liner longevity. We work with trusted manufacturers who use thick, durable vinyl that resists fading and chemical damage.
Timing coordination ensures your pool isn’t empty longer than necessary. We schedule delivery and installation to minimize downtime during swimming season.
Vinyl liner pool installation costs and considerations
Vinyl liner pool installation costs range from $25,000 to $75,000 depending on size and features. Professional installation involves multiple cost factors beyond materials, and understanding long-term value helps homeowners make informed decisions.
How much does it cost to install a vinyl liner pool?
We typically see vinyl liner pool installation costs between $25,000 and $65,000 for standard 300-400 square foot pools. Larger or more complex installations can reach $75,000.
Cost Breakdown by Pool Size:
- Small pools (12′ x 24′): $18,500-$35,000
- Medium pools (16′ x 32′): $35,000-$55,000
- Large pools (20′ x 40′): $55,000-$75,000
The installation process takes 4-8 weeks. This includes excavation, wall assembly, plumbing, electrical work, and deck construction.
Vinyl liner pools cost less than concrete pools initially. They’re also faster to install than other pool types.
Factors that impact cost beyond materials
Several factors influence our final installation costs beyond the vinyl liner itself. Site preparation often adds $2,000-$8,000 to projects.
Key Cost Factors:
- Excavation complexity: Rocky soil or tight access increases costs
- Custom features: Steps, benches, and unique shapes add expense
- Plumbing upgrades: Additional jets or lighting systems
- Decking materials: Concrete, pavers, or composite options vary widely
Pool depth affects pricing too. Deeper pools require more materials and labor. Custom shapes cost more than standard rectangles.
Local permits typically run $200-$500. Some areas require additional inspections that add to total costs.
The long-term value of a professionally installed liner
Professional installation protects our investment over time. We expect to pay around $13,000 in maintenance costs over ten years with proper installation.
Vinyl liners need replacement every 8-12 years. Replacement costs range from $4,500-$6,500 when professionally installed.
EPA-approved pool chemical labels recommend keeping calcium hardness between 175–225 ppm for vinyl and fiberglass pools to prevent liner damage and chemical inefficiencies.
Long-term Benefits:
- Proper installation prevents premature liner failure
- Professional plumbing reduces leak risks
- Quality wall systems last 20+ years
- Warranty coverage on materials and labor
Poor installation leads to costly repairs. Wrinkled liners, improper water chemistry, and structural issues create expensive problems.
We recommend getting multiple quotes from licensed contractors. This ensures competitive pricing and quality workmanship for long-term value.
Conclusion
Vinyl liner pools offer a smart balance between cost and customization. They work well for most homeowners who want an affordable pool option.
The installation process takes several weeks. You’ll need to plan for excavation, plumbing, and liner installation.
We recommend getting quotes from multiple contractors. Ask about their experience with vinyl liner installations.
Proper maintenance helps your liner last longer. Keep water chemistry balanced and avoid sharp objects in the pool.
Vinyl liner pools add value to your home. They create a great space for family fun and relaxation.
The decision depends on your budget and long-term plans. Consider how long you’ll stay in your home and your maintenance preferences.
Most homeowners find vinyl liner pools meet their needs well. The combination of affordability and design flexibility makes them a popular choice.
Schedule your vinyl liner pool installation with Little Dipper to ensure a precise fit, fast turnaround, and long-lasting performance.

